How to install Android KitKat on your PC Natively!
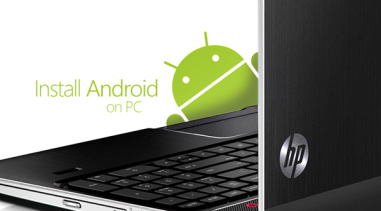 When we talk about Android, what’s the first thing that comes to your mind? smartphones or tablets (unless there’s an app that you’re crazy about and that’s what you prefer). However, Android, being the open source platform that it is, offers much more flexibility in terms of the hardware that it can run on, and so there’s Android out there that can run just fine on x86 computer architecture as well. Yup – full-blown Android running natively, not the likes of BlueStacks! In this post, I’ll show you exactly how to get that.
Prerequisites
Step 1 : Download the version of Android-x86 ISO that’s appropriate for your hardware, and
Universal USB Installer.
Step 2 :

Step 3 : Reboot your computer using the USB drive as the source. You might need to change a couple of settings under your system’s BIOS to do that, although most modern systems already default to USB drive if it’s available.(Press F9 on HP laptop when system starts)
Step 4 : In the menu that appears, choose Install Android x86 to hard disk.
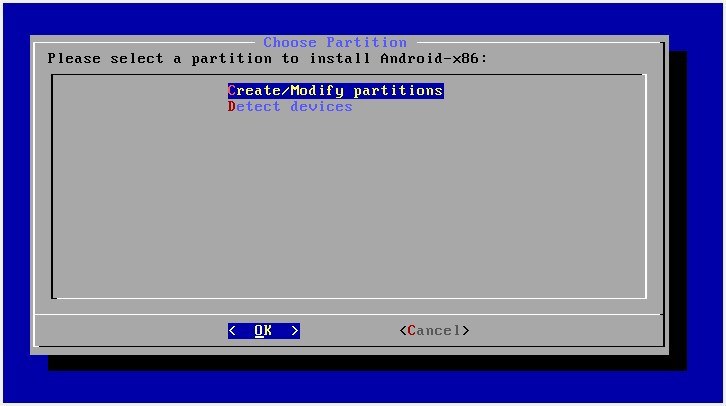
Step 5 : Choose which partition to install Android x86 on. If you’re using a new partition for that, it’s better to format it at this point.
Step 7 : Now, another prompt will ask you to make system /r/w. Hit Yes on this as well, especially if you’d like to modify your Android x86 installation later.
Step 8 : If you’re installing ICS or earlier, you will get another prompt to install virtual SD card. Use 1800 MB for space, as that’s the maximum supported.
Step 9 : Reboot your PC.
That’s all there is to it. Since this will be a multiboot setup, you can choose to either boot to Windows or Android per your liking. Enjoy!
Video Tutorial Video Credits- Ravi Singh
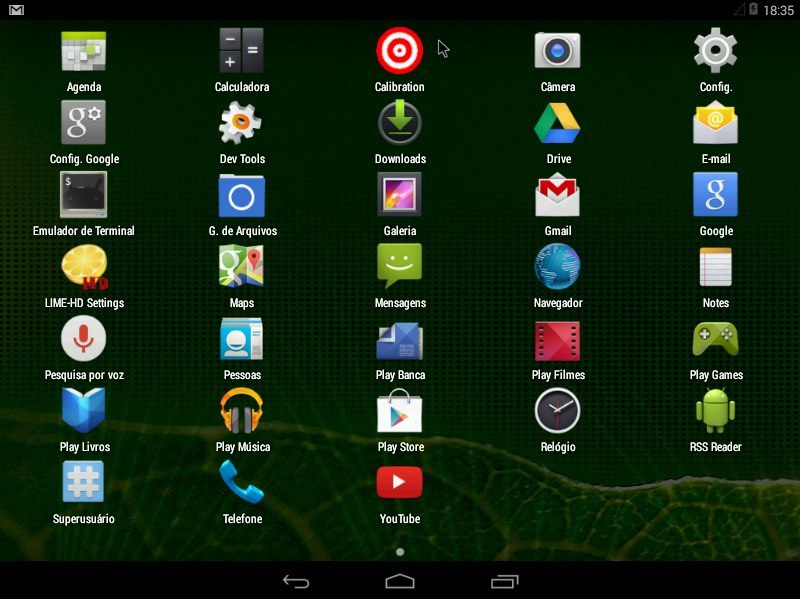
Screenshots
When we talk about Android, what’s the first thing that comes to your mind? smartphones or tablets (unless there’s an app that you’re crazy about and that’s what you prefer). However, Android, being the open source platform that it is, offers much more flexibility in terms of the hardware that it can run on, and so there’s Android out there that can run just fine on x86 computer architecture as well. Yup – full-blown Android running natively, not the likes of BlueStacks! In this post, I’ll show you exactly how to get that.Prerequisites
- Android x86 ISO (please download the most appropriate version)
- USB Flash drive (you may use a bootable CD/DVD as well)
- Free hard disk space on the computer/laptop that you want to install Android on:
- For Froyo – ICS, 2GB
- For Jelly Bean 4.2 and 4.3, 8GB
- For KitKat 4.4.2, 10GB
- Bootable USB thumb drive creater Software which you can grab
Note:- Universal USB Installer is recommended.
from:http://skyisthebest.blogspot.in/2014/08/the-best-free-tools-for-creating.html
Step 1 : Download the version of Android-x86 ISO that’s appropriate for your hardware, and
Universal USB Installer.
Step 2 :
- Create a bootable USB drive using
Universal USB Installer and the ISO image that you downloaded earlier. - Simply Agree the TOS,
- Choose Android from Linux Distribution drop down button,
- Select the ISO you downloaded in step 1.
- Select Pendrive,Check Format and click Create.
- That's it. Now you have bootable pendrive of Android.
Step 3 : Reboot your computer using the USB drive as the source. You might need to change a couple of settings under your system’s BIOS to do that, although most modern systems already default to USB drive if it’s available.(Press F9 on HP laptop when system starts)
Step 4 : In the menu that appears, choose Install Android x86 to hard disk.
Step 5 : Choose which partition to install Android x86 on. If you’re using a new partition for that, it’s better to format it at this point.
You can install it on another Pendrive also.Step 6 : A few prompts will appear pertaining to installation of GRUB Bootloader. Make sure you allow this.
Step 7 : Now, another prompt will ask you to make system /r/w. Hit Yes on this as well, especially if you’d like to modify your Android x86 installation later.
Step 8 : If you’re installing ICS or earlier, you will get another prompt to install virtual SD card. Use 1800 MB for space, as that’s the maximum supported.
Step 9 : Reboot your PC.
That’s all there is to it. Since this will be a multiboot setup, you can choose to either boot to Windows or Android per your liking. Enjoy!
Video Tutorial Video Credits- Ravi Singh
Screenshots
Android x86 ISO
Universal USB Installer
No comments:
Post a Comment